

Hi there, and welcome to Part 4 of the Firebase Series, which I now like to call a Free Firebase and Flutter Course :) The goal of this course is to get you uber comfortable with firebase, it’s features and how to make use of them in your product using Flutter.
This tutorial will cover Firestore DB security rules. It’ll be completely Firebase focused so no Flutter. Today we’ll secure our Firestore DB with some simple rules and get some unit tests for it up and running.
Firestore Rules
Firestore rules can be written in two ways, in the console where you can test them manually using the simulator or Locally on your machine where you can also test them (after some setup) and deploy them. I was in two minds of which one to use, but ultimately decided to go the longer, more error prone route because that’s what you’d want to use in production for long term maintenance.
This tutorial will be following these steps:
- Create a new dedicated directory for the firebase project
- Init your firestore project which will pull the current rules you have
- Go over basic knowledge around security rules
- Add some tests to confirm the rules are working
- Deploy the new rules
The reason we’re taking the non-console route is first off so you can have a copy of your rules in source control. The second more important part is so that you can write tests that will confirm after any update that the new rules didn’t break any of the older security expectations.
We can’t write tests in the console yet, we can only use the simulator to confirm the rules are what we want it to be. But having to go over 10-20 tests manually in the console simulator is not a nice process. Believe me.
Environment Setup
Lets get you ready for firestore rules testing on your machine. The first thing we need is to get the firestore simulator running locally. We’ll start by installing the emulator. This requires you to have Firebase and Firebase-CLI to be installed on your machine.
First we’ll install the firestore emulator
firebase setup:emulators:firestoreThis will download everything you need. When complete we want to ensure everything is working. To do that we’ll start the emulator.
firebase emulators:start --only firestoreYou should see some things print out and then “All emulators started, it is now safe to connect”. IF that’s not the case, which I’ve had happen on a different machine here are some things you can try.
- Make sure your Firebase libraries are at their latest versions by upgrading or re-installing. Cli and firebase
- Make sure you’re using an updated version of node
Check out the documentation in case I didn’t mention any of the required setup steps relating to your machine.
Project Setup
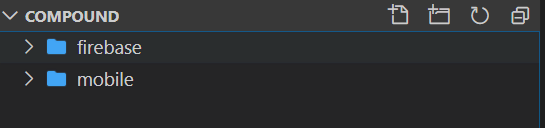
The way I like to orgranise my project is as follows. My firebase project in one folder and mobile app src in another. Create a new folder to move your mobile code into (or not, your choice) called mobile and a then create a new folder called firebase. My project looks something like this.
In your terminal navigate into the firebase folder and initialise a new firestore project.
cd firebase
firebase init firestore
When asked if you’re ready to proceed enter ‘Y’, select an existing project (compound) and then use the default names for all the files. Press enter until complete.
You’ll get a message similar to this.
i  Writing configuration info to firebase.json...
i  Writing project information to .firebaserc...
i  Writing gitignore file to .gitignore...
IDE Setup
Install the Firebase VS Code Extension to get highlighting for the rules file.
Now we can move onto the rules.
Firestore Rules
To secure your DB you need to provide rules. There are the basic read and write rules, those can be broken down into a more granular level.
read: Read can be broken down into two smaller rules that cover all of the read functionality.
- get: Applies to a single document read request. An example of this would be getting a user profile.
- list: Applies to queries and collection read requests. In our example that would be getting the posts collection data.
write: Write can be broken into 3 smaller rules.
- create: Applies to creating a nonexisting document
- update: Applies to writes into an existing document
- delete: Applies to the removal of a document(s) from the DB.
The way rules are applied in firestore is by using the allow keyword followed by the operation rule (read / write) and then providing a condition that has to be true. If there’s no rule defined it will be allowed so you have to make sure you have encompassing rules and then specific ones for certain collections.
To accurately create a rule set we need to know what we want so lets go over the three we’ll cover now:
- The creator of a post can delete a post
- Only the creator of a post may edit it
- An admin can delete a post
There’s obviously a lot more but I’ll show you the base and let you go from there. Lets dive in.
Writing the first Rule
Open up the firestore.rules file and we’ll change the rules to the following
rules_version = '2';
service cloud.firestore {
  match /databases/{database}/documents {

    // lock down the db
    match /{document=**} {
      allow read: if false;
      allow write: if false;
    }
  }
}
Firestore applies rules to specific paths and start at the top. If we leave it like this you can’t create a post, or a user, or anything like that. You basically can’t access the DB. Security rules apply to the matched path, here we’re doing all documents under every collection by using the **.
So how do we test if this works? lets setup the tests. This is a little bit of a process, but it’s worth it. I’ll be following the master of Firebase, Jeff Delaney from Fireship.io, and using his “Testing Firestore Security Rules” article. I have little JavaScript experience besides making things work and doing what’s necessary so I’ll refer to this article to transfer the knowledge to you.
Setting up our testing environmet
in the firebase folder initialise npm and then install jest and @firebase/testing
cd firebase

# initialise npm project
npm init -y

# install @firesbase/testing
npm i @firebase/testing

# install jest for vanilla JS testing
npm i jest
Creating test helpers: Setup and Teardown
The first thing introduced by Jeff is Helper functions. We’ll create a setup function that will initialise the database with a unique projectId and optionally seeds it with mock user data and database documents.
Instead of explaining what the code does after, I’ll add additional comments to cover line by line what we’re doing so it’s easier to follow. This is the setup function we’ll be using when writing our tests. Create a new folder called spec in the root of the firebase folder. Inside create a file called helpers.js. In there put the following code.
const firebase = require("@firebase/testing");
const fs = require("fs");

module.exports.setup = async (auth, data) => {
  // Create a unique projectId for every firebase simulated app
  const projectId = `rules-spec-${Date.now()}`;

  // Create the test app using the unique ID and the given user auth object
  const app = await firebase.initializeTestApp({
    projectId,
    auth,
  });

  // Get the db linked to the new firebase app that we creted
  const db = app.firestore();

  // Apply the test rules so we can write documents
  await firebase.loadFirestoreRules({
    projectId,
    rules: fs.readFileSync("firestore-test.rules", "utf8"),
  });

  // Write mock documents with test rules
  if (data) {
    for (const key in data) {
      const ref = db.doc(key);
      await ref.set(data[key]);
    }
  }

  // Apply the rules that we have locally in the project file
  await firebase.loadFirestoreRules({
    projectId,
    rules: fs.readFileSync("firestore.rules", "utf8"),
  });

  // return the initialised DB for testing
  return db;
};
Copy the firestore.rules file and paste in the same directory. Rename it to firestore-test.rules and allow read and write for everything.
rules_version = '2';
service cloud.firestore {
  match /databases/{database}/documents {

    // lock down the db
    match /{document=**} {
      allow read: if true;
      allow write: if true;
    }
  }
}
Next up we’ll do the teardown function that will clean up the simulated environment for the other tests to run. In the helper function add another exported function called teardown.
module.exports.teardown = async () => {
  // Delete all apps currently running in the firebase simulated environment
  Promise.all(firebase.apps().map(app => app.delete()));
};
Creating test helpers: Custom Jest matchers
The next two helpers will be purely to increase readability of our tests when reading them. Every test will ultimately confirm if an operation was either allowed or denied. The matchers we’ll write below is to ensure we have a shorthand way of doing that.
expect.extend({
  async toAllow(testPromise) {
    let pass = false;
    try {
      await firebase.assertSucceeds(testPromise);
      pass = true;
    } catch (err) {
      console.log(err);
    }

    return {
      pass,
      message: () =>
        "Expected Firebase operation to be allowed, but it was denied",
    };
  },
});

expect.extend({
  async toDeny(testPromise) {
    let pass = false;
    try {
      await firebase.assertFails(testPromise);
      pass = true;
    } catch (err) {
      console.log(err);
    }
    return {
      pass,
      message: () =>
        "Expected Firebase operation to be denied, but it was allowed",
    };
  },
});
The code above confirms that the assert passes or fails, if it fails it leaves the pass value as false, else it sets it to true. I print out the error because when a rule fails it’ll give you the line number “LN8” so you can see which allow statement is causing your test to fail. Now, finally lets write a test and then some rules
Acutally writing a test 😅
See I told you it’s a lot of setup, but this is where it pays off. In the spec folder create a new file called collections.spec.js. We’ll require the helper functions then create a test suite called “Safety Rules” this will contain general tests for the first rule which is to deny everything. We’ll supply the afterEach function to all suites so the teardown function is called.
const { setup, teardown } = require("./helpers");

describe("Safety rules", () => {
  afterEach(async () => {
    await teardown();
  });

  test("should deny a read to the posts collection", async () => {
    const db = await setup();

    const postsRef = db.collection("posts");

    await expect(postsRef.get()).toDeny();
  });

  test("should deny a write to users even when logged in", async () => {
    const db = await setup({
      uid: "danefilled",
    });

    const usersRef = db.collection("users");
    await expect(usersRef.add({ data: "something" })).toDeny();
  });
});
Now, open up a second terminal or console and start the firestore emulator in it. Keep this open through your entire testing process.
firebase emulators:start --only firestoreOnce that’s running run the tests in a separate terminal / console / powershell
jest ./specYou should see both tests passing.
 PASS  spec/collections.spec.js
  General DB Rules
    √ should deny a read to the posts collection (2136ms)
    √ should deny write to users even when logged in (175ms)
That will be our general tests and that should always pass. It seals the DB. Next we’ll create rule 1 and 2 that says only the creator of a post can update or delete it. Add the following rule under the document=** rule and the userOwnsPost.
// Allow user that owns a post to update or delete it.
match /posts/{postId} {
  allow update, delete: if userOwnsPost()
}

// Check if the userId matches the id of the user requesting the action
function userOwnsPost() {
  return resource.data.userId == request.auth.uid;
}
What this is doing is checking if the userId on the post (resource.data is the document being requested) matches the uid on the auth object (managed by firebase auth). Now for the test. We’ll create a new Test Suite for the Posts Rules then add the test in there.
describe("Posts rules", () => {
  afterEach(async () => {
    await teardown();
  });

  test("should allow update when user owns post", async () => {
    const mockData = {
      "posts/id1": {
        userId: "danefilled1",
      },
      "posts/id2": {
        userId: "not_filledstacks",
      },
    };

    const mockUser = {
      uid: "danefilled1",
    };

    const db = await setup(mockUser, mockData);

    const postsRef = db.collection("posts");

    await expect(
      postsRef.doc("id1").update({ updated: "new_value" })
    ).toAllow();

    await expect(postsRef.doc("id2").update({ updated: "new_value" })).toDeny();
  });

  test("should allow delete when user owns post", async () => {
    const mockData = {
      "posts/id1": {
        userId: "danefilled1",
      },
      "posts/id2": {
        userId: "not_filledstacks",
      },
    };

    const mockUser = {
      uid: "danefilled1",
    };

    const db = await setup(mockUser, mockData);

    const postsRef = db.collection("posts");

    await expect(postsRef.doc("id1").delete()).toAllow();

    await expect(postsRef.doc("id2").delete()).toDeny();
  });
});
Next up is rule 3, An admin can also delete a post. This will require us to split up the update and delete rules. Change the code for posts rules to the following and add the following functions.
  match /posts/{postId} {
    // Allow a user that owns the post to delete it
    allow update: if userOwnsPost();
    allow delete: if userOwnsPost() || userIsAdmin();
    allow create;
  }

  // check if the current user is an admin
  function userIsAdmin() {
    return getUserData().userRole == 'Admin';
  }

  // Get the user data
  function getUserData() {
    return get(/databases/$(database)/documents/users/$(request.auth.uid)).data
  }
The getUserData function makes a request to the db to the users collection and gets the data from the document id equal to the logged in users uid. On that data we have a field called userRole which we set to Admin. If it equals Admin then we know the user is Admin.
For this set of rules we’ll write two tests. One to confirm we can delete a document when we’re admin and one to confirm we can’t delete a document if we’re a user.
test("should allow delete when user is admin", async () => {
  const mockData = {
    "users/filledstacks": {
      userRole: "Admin",
    },
    "posts/id1": {
      userId: "not_matching",
    },
    "posts/id2": {
      userId: "not_matching2",
    },
  };

  const mockUser = {
    uid: "filledstacks",
  };

  const db = await setup(mockUser, mockData);

  const postsRef = db.collection("posts");

  await expect(postsRef.doc("id1").delete()).toAllow();
});

test("should deny delete when user is not admin", async () => {
  const mockData = {
    "users/filledstacks": {
      userRole: "User",
    },
    "posts/id1": {
      userId: "not_matching",
    },
    "posts/id2": {
      userId: "not_matching2",
    },
  };

  const mockUser = {
    uid: "filledstacks",
  };

  const db = await setup(mockUser, mockData);

  const postsRef = db.collection("posts");

  await expect(postsRef.doc("id1").delete()).toDeny();
});
For the last rule lets make it so that a user can create a post when they’re logged in. Update the posts rules to the following.
    match /posts/{postId} {
      // Allow a user that owns the post to delete it
      allow update: if isPostOwner();
      allow delete: if isPostOwner() || isAdmin();
      allow create: if loggedIn();
    }

    // Check if the user is logged in by confirming the auth object managed
    // by firebase has a uid.
    function loggedIn() {
      return request.auth.uid != null;
    }
Then the tests to make sure it works.
test("should allow adding a post when logged in", async () => {
  const db = await setup({
    uid: "userId",
  });

  const postsRef = db.collection("posts");
  await expect(postsRef.add({ title: "new post" })).toAllow();
});

test("should deny adding a post when not logged in", async () => {
  const db = await setup();
  const postsRef = db.collection("posts");
  await expect(postsRef.add({ title: "new post" })).toDeny();
});
That’s enough testing for now. You get the idea. Check out the documentation on firebase for more tricks but this should get you very far in terms of access level control and securing your database in general.
Deploy the rules
The last thing to do it deploy the rules. This will be done by publishing the firestore app only.
firebase deploy --only firestoreAnd that’s it. Your DB is now locked down to random reads and only the rules you’ve added will take effect. One thing you’ll need to do for the app to be able to create new users is add a rule to allow writing to the users collection from anyone. The way to do this properly (which we will) is by using a trigger function and using the admin profile to create your users. No one outside of the firebase project admin should be able to create new users. But that’s a tutorial for another day :)
I hope you enjoyed this one. You can no easily update and test your rules and I hope you’re not in the dark on them anymore. Until next week.
Dane Mackier